Post Videos from YouTube to Instagram a Simple Guide
Learn how to post videos from YouTube to Instagram. Our simple guide covers formatting, manual posting, automation tools, and tips for maximum engagement.
Putting a clip from your YouTube video on Instagram is one of the savviest moves you can make to grow your audience. The whole idea is to take a longer video, slice out a compelling, shorter piece for Instagram, and use it to point people back to your main YouTube channel. It’s a fantastic way to build a bridge between two very different platforms and get more eyes on your work.
Why Sharing YouTube Videos on Instagram Is a Smart Move
Repurposing your YouTube videos for Instagram can honestly be a game-changer. You're connecting with two powerful, yet distinct, user bases: the people who settle in for a deep-dive on YouTube and the fast-scrolling, highly engaged crowd on Instagram. When you share a great clip, a highlight reel, or a quick teaser, you’re not just posting more content. You're actually building a complete ecosystem around your brand.
Think about a gaming channel that takes a 30-minute stream and chops it down to a 60-second Reel filled with nothing but the best moments. That single Reel becomes a powerful funnel, pulling new followers from Instagram over to the main event on YouTube and boosting your visibility everywhere.
Tapping into an Overlapping Audience
This strategy is so effective because, let's be real, your audience is probably already hanging out on both platforms. It's become standard practice for a reason. While 69.8% of Instagram users post photos or videos, a staggering 76.9% of them are also active on YouTube. That’s a massive overlap and a golden opportunity.
With Reels now making up over 50% of the time people spend on Instagram, short-form video is the perfect vehicle for your YouTube highlights. To really nail this, it helps to understand effective cross-posting strategies that can maximize your reach. You can dig deeper into these audience habits and find more insights on Instagram user statistics to fine-tune your approach.
The Strategic Advantages of Repurposing
Beyond just getting in front of more people, this approach has some huge benefits for any creator trying to grow their brand efficiently. It’s all about working smarter, not harder, with the content you’ve already poured your heart into.
- Boost Your Posting Frequency: It’s so much easier to keep a consistent schedule on Instagram when you aren't forced to create brand-new content from the ground up every single time.
- Cross-Pollinate Your Audience: You're actively encouraging your Instagram followers to become YouTube subscribers and vice-versa. This tightens up your community across the board.
- Showcase Your Greatest Hits: You can cherry-pick your absolute best YouTube moments and use them as powerful hooks to draw in new viewers who might have never found your channel otherwise.
Turning one long-form video into several short-form clips drastically increases the return on your content creation efforts. This isn't just about saving time; it's about amplifying your message and building a stronger, more connected presence online.
Getting Your YouTube Video Ready for Instagram
Before you can share a YouTube video on Instagram, there’s a little prep work involved. You can't just take a widescreen video, drop it into a vertical-first platform, and hope for the best. The good news is this isn't about becoming a professional video editor overnight. It's about making a few smart tweaks so your content feels like it belongs on Instagram.
The whole point is to grab someone's attention in the first few seconds of their scroll. That means adapting your video to fit the unique formats and viewing habits of the Instagram audience.
Nail the Aspect Ratio and Length
The single most important step is resizing your video. A standard 16:9 YouTube video looks tiny and gets awkwardly cropped in the Instagram feed. To make it look right, you have to reformat it for where it’s going to live.
- For Reels and Stories: Go with a 9:16 vertical aspect ratio. This is non-negotiable. It fills the entire phone screen, creating that immersive experience that keeps people watching.
- For Feed Posts: A 1:1 square or a 4:5 portrait ratio is your best bet. Both of these take up way more real estate in the feed than a horizontal video, making them much harder to just scroll past.
Length is just as critical. Instagram Reels can now be up to 90 seconds, and each Story clip maxes out at 60 seconds. Your job is to find the most engaging part of your longer YouTube video and trim it down to fit these tighter time limits.
The goal is to deliver maximum impact in minimum time. Find the key takeaway, the funniest moment, or the most dramatic reveal from your original video. That's your golden clip.
Edit for Silent Viewers and Scrollers
A massive chunk of people on Instagram watch videos with the sound off. If your video has someone talking, you absolutely have to add captions. It’s not optional anymore.
Tools like CapCut or InShot make this ridiculously easy. Most have an auto-caption feature that does 90% of the work for you—just give it a quick proofread. This one small step can make a huge difference in how long people stick around.
You also need a killer cover image, or thumbnail. It’s the first thing people see. Pick a clear, high-contrast frame from your video that sparks a little curiosity and shows exactly what the clip is about.
Making these adjustments is how you tap into Instagram's huge audience. While YouTube is a giant with 2.5 billion monthly users, Instagram is right behind it with 2.09 billion. Even more telling, video content drives over 60% of the time spent on the platform.
Choosing the Right Clip to Repurpose
Let's be honest, not every piece of your YouTube video is going to work on Instagram. You have to put on your curator hat and pull out the best highlights. If you're having trouble deciding what to clip, our guide on how to properly post a YouTube video on Instagram has some great strategies for finding that perfect moment.
To make things even easier, I've put together a quick cheat sheet with all the technical specs you need to get right.
Instagram Video Format Cheat Sheet
Use this quick reference guide to get the technical specs right for your Instagram Reels, Stories, and Feed Video posts.
| Video Type | Recommended Aspect Ratio | Maximum Length | Recommended Resolution |
|---|---|---|---|
| Reels | 9:16 | 90 seconds | 1080 x 1920 pixels |
| Stories | 9:16 | 60 seconds | 1080 x 1920 pixels |
| Feed Video | 1:1 or 4:5 | 60 minutes | 1080 x 1080 or 1080 x 1350 pixels |
By taking a few minutes to resize, trim, and add captions, you’re giving your video the best possible chance to succeed. It’ll look and feel right at home on Instagram, which is exactly what you want.
The Hands-On Approach: Manually Posting Your Video
Alright, your video clip is edited down and ready for the spotlight on Instagram. Now it's time to roll up your sleeves and handle the upload yourself. Going manual gives you total control over how your post looks and feels, from the caption to the hashtags. It really just boils down to getting the video from your computer to your phone and then sharing it through the Instagram app.
First, you need the video file. The absolute best way to get it is by downloading your own video directly from your YouTube Studio. This ensures you're working with the highest quality version possible, sidestepping any weird compression artifacts you might get from third-party downloader sites.
Getting the Video Onto Your Phone
With the video file saved on your computer, the next hurdle is getting it over to your phone. Thankfully, this is pretty simple, and the best method usually just comes down to what kind of devices you're using.
- For Apple Users: AirDrop is your hero here. It's incredibly fast. A couple of clicks, and the video magically appears in your iPhone's photo library.
- For Android and Cross-Platform: Cloud storage is the way to go. Just upload the video to a service like Google Drive or Dropbox from your computer, then open the app on your phone and download it.
- The Old-Fashioned Way: Don't forget the trusty USB cable. Connecting your phone directly to your computer works perfectly well for a quick drag-and-drop file transfer.
This image lays out the key editing steps you should complete before you even think about transferring the file.
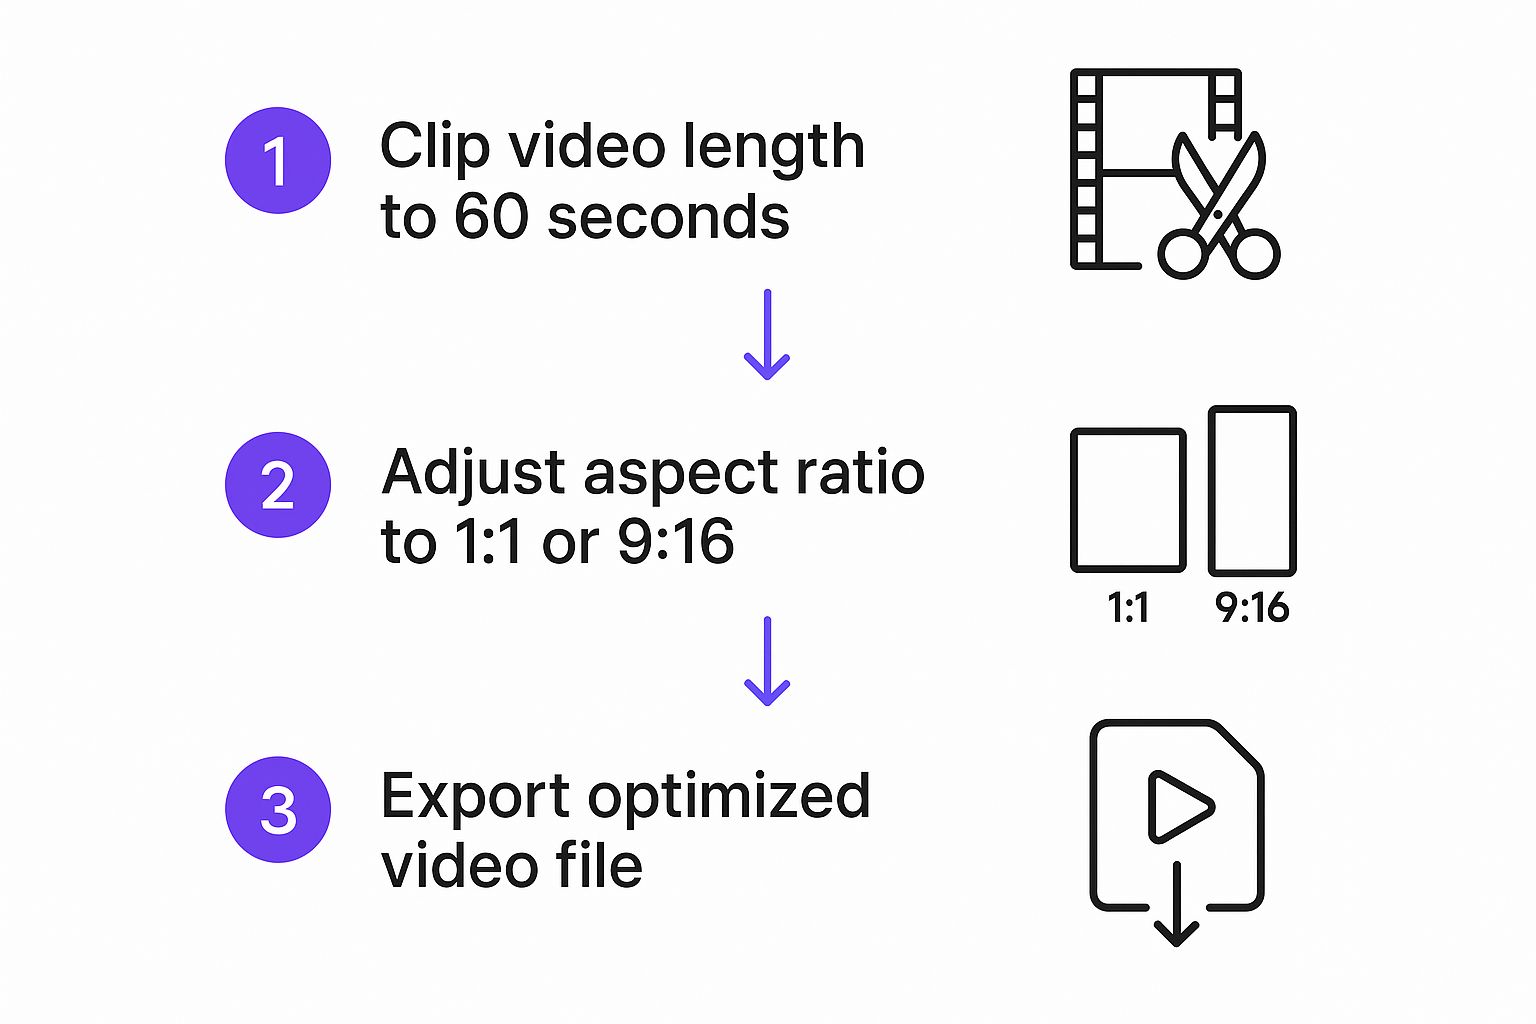
As you can see, the core of the prep work is trimming the video to the right length, reframing it for Instagram's vertical formats, and then exporting that final, optimized clip.
Crafting the Perfect Instagram Post
Now for the fun part: posting the video. Whether you're aiming for a Reel, a Story, or a classic feed post, the initial steps are nearly identical. Just open Instagram, tap that '+' icon, and choose the video from your phone's gallery.
But don't just hit "Share" and call it a day. The magic happens in the caption. You need a killer first line to stop people from scrolling, followed by a clear call-to-action (CTA) that tells them what to do next.
Don’t just post your video and hope for the best. Give your audience a reason to care and a clear next step. A simple "Watch the full video on my YouTube channel—link in bio!" is often all it takes to nudge a viewer toward becoming a subscriber.
Finally, round out your post with a smart mix of relevant hashtags. I've found that using a combination of popular, high-volume hashtags alongside smaller, niche-specific ones gives you the best chance at discovery. This strategy helps the algorithm figure out who your content is for and show it to the right people.
Using Repurposing Tools to Automate Your Workflow
Doing everything by hand gives you total control, but let's be honest—it’s a massive time sink. If you're trying to keep up with a consistent posting schedule, the manual grind can quickly become overwhelming. This is where automation tools come in. They're your secret weapon for scaling your content strategy and getting hours back in your week.
Think about it. What if your latest YouTube video was instantly scanned, chopped into a few great Reels, and scheduled to go live on Instagram right when your audience is scrolling? That's what automation does. It turns a clunky, multi-step chore into a smooth, hands-off process.
How Automation Tools Make Life Easier
Repurposing tools are built specifically to connect YouTube and Instagram. Instead of you having to download a video, send it to your phone, edit it, and finally upload it, these platforms handle all the boring parts for you.
You just set up the rules, and the tool does the rest. For example, it can grab any new video you publish, use AI to find the most interesting 60-second highlights, slap on your branded captions, and pop them into your Instagram queue. This is how you build a steady stream of content without burning out. Truly mastering the art of repurposing content is what separates the creators who struggle from those who scale.
Most of these tools come with some game-changing features:
- Automatic Importing: Connect your YouTube channel, and the tool pulls in new videos as soon as they’re live.
- AI-Powered Clipping: Smart tech analyzes your videos to find the moments most likely to go viral.
- Branded Templates: Automatically add your logos, custom captions, or progress bars to keep everything looking consistent.
- Smart Scheduling: Post your clips at the best times based on when your audience is actually online.
The real win here isn't just saving time. It's about consistently feeding your Instagram with quality content, which is exactly what you need to do to grow your audience and keep them hooked.
Choosing the Right Automation Platform
There are a ton of tools out there, and the right one for you really depends on your budget and what you need it to do. Some are just simple schedulers, while others are full-blown repurposing powerhouses. A platform like Repostly, for example, is designed to bring everything under one roof, so you can manage all your social accounts from one dashboard.
When you’re looking at different options, don’t just check if they can post videos from YouTube to Instagram. See if they also offer analytics. The goal is to create a feedback loop—you want to see which clips your Instagram followers love so you can double down on what works. If you want to see what's out there, checking out different social media automation tools is a great way to compare features.
Ultimately, bringing an automation tool into your workflow is about working smarter, not harder. It helps you keep your Instagram presence strong, pushes viewers back to your YouTube channel, and frees up your most valuable resource: your time.
Strategies for Driving Maximum Engagement
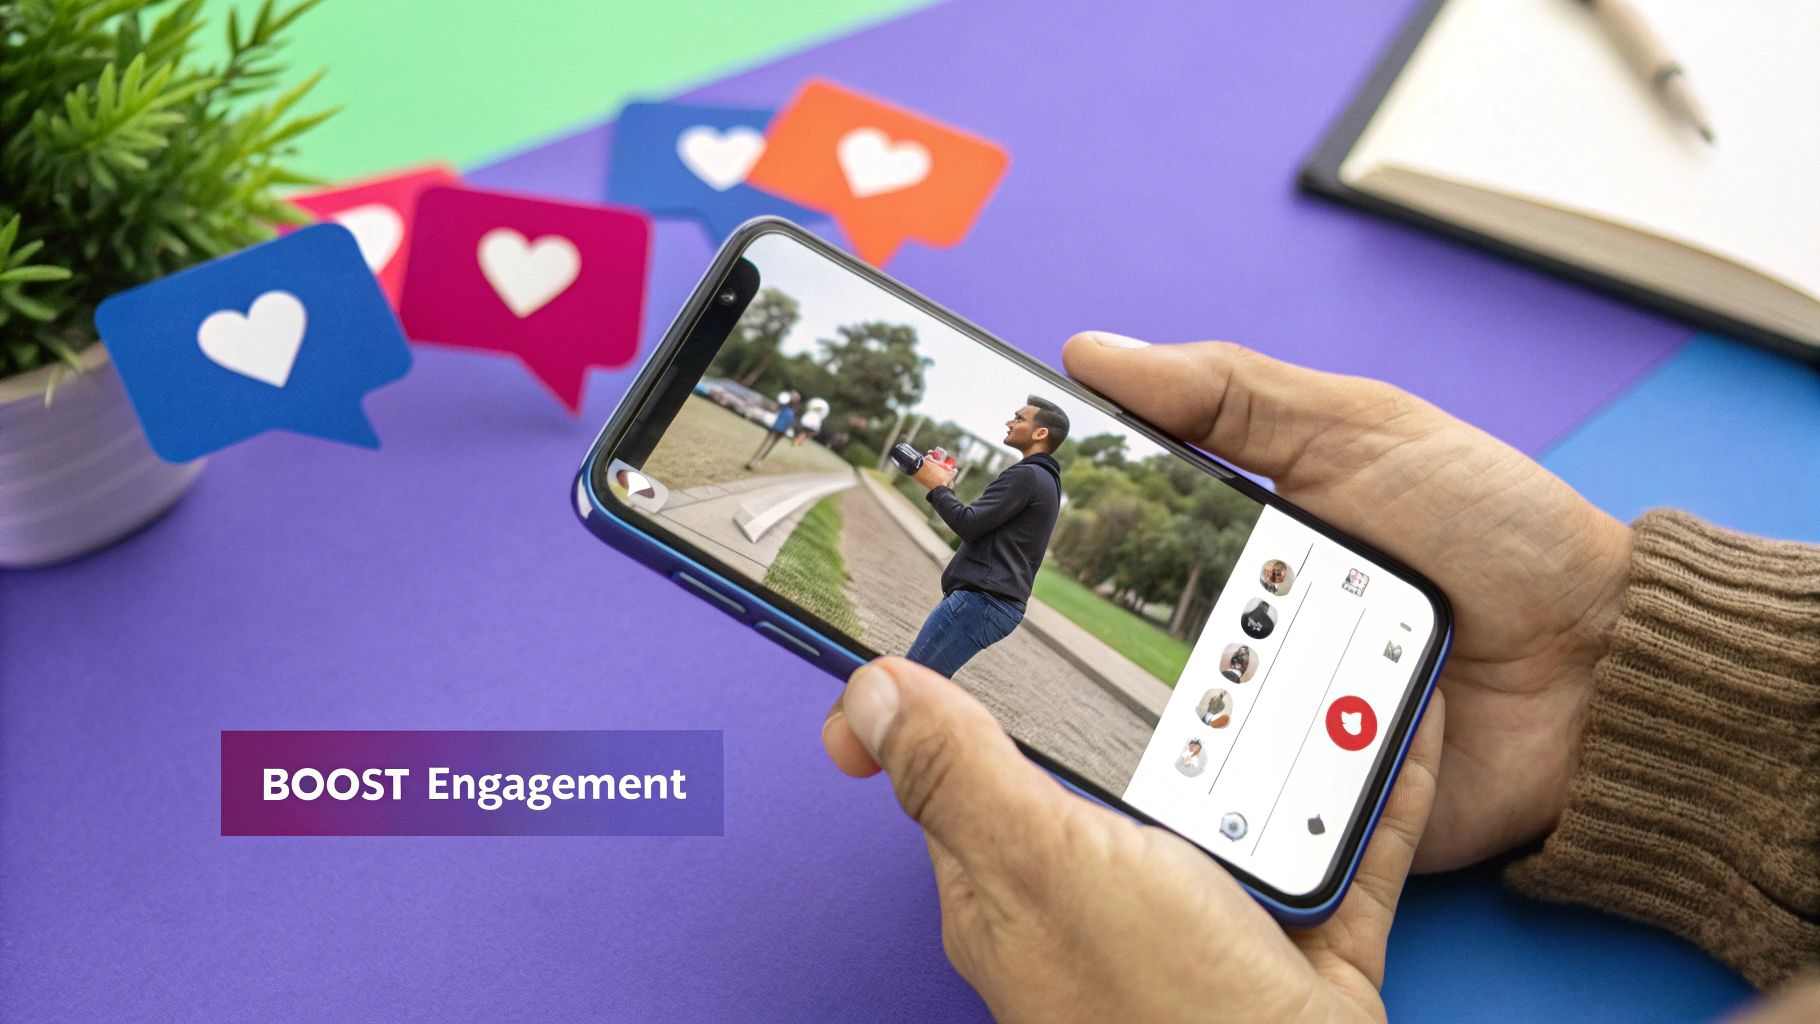
Alright, so you’ve got your video on Instagram. That’s a great first step, but the real work is just beginning. Getting your content seen and, more importantly, felt by an audience requires you to think like a seasoned Instagram creator, not just someone repurposing clips.
It's all about turning that video into an experience that stops the scroll and gets people talking. From the thumbnail you choose to the last hashtag you add, every single detail plays a part in this fast-moving feed.
Hook Them in the First Three Seconds
You have a tiny window to grab someone's attention before they swipe past. Your first 3 seconds are absolutely critical. Don't build up to the good stuff—start with it. Open with the most surprising, valuable, or visually stunning moment from your entire clip.
And please, don't let Instagram pick a random, blurry frame for your thumbnail. Create a custom cover image with high-contrast visuals and maybe a bit of bold text. This acts like a mini-poster for your video, telling people exactly why they should stop and watch.
The secret is making your repurposed content feel like it was born on Instagram. This means you're not just broadcasting a video; you're starting a conversation using all the interactive tools the platform offers.
Get People Talking with Smart Captions and Hashtags
A good caption doesn't just explain the video; it invites people into a discussion. The easiest way to do this? End with a direct question. If you post a clip from a travel vlog, for instance, you could ask, "What's the #1 destination on your bucket list? Drop it in the comments! 👇"
Your hashtag game needs to be just as strategic. I've found the sweet spot is a mix of broad and super-specific tags.
- Broad Tags: Use 2-3 popular hashtags like #ContentCreator or #VideoMarketing to get into those bigger streams of content.
- Niche Tags: This is where the magic happens. Add 5-7 specific tags like #PremiereProTips or #YouTubeGrowthHacks to reach the people who are really looking for what you offer.
- Branded Tag: Always include one unique tag for your brand. It helps build a community and makes it easy to find content people create about you.
This combo approach casts a wide net but also hones in on your ideal viewer. If you're hungry for more ideas, there are tons of strategies for boosting your Instagram engagement you can explore.
Use Instagram's Own Tools to Your Advantage
Don't just post the video and walk away. When you post videos from YouTube to Instagram, lean into the platform's native features, especially for Reels and Stories.
Is there a trending audio clip on Reels that fits your video's vibe? Use it! This can dramatically increase your video's reach. When sharing to Stories, throw in interactive stickers like polls, quizzes, or a Q&A box. These little additions are powerful because they directly invite your audience to participate, turning passive viewers into active followers.
For a much deeper look at this, check out our complete guide to https://repostly.app/blog/increase-instagram-engagement-689453d8650d8992d6cf6f0a.
Common Questions About YouTube to Instagram Videos
Even with the best strategy, you're going to hit some snags when repurposing YouTube videos for Instagram. It happens to everyone. Let's walk through some of the most common questions and sticking points so you can handle them like a pro.
What About the Music in My Video?
This question comes up all the time. You used a popular song in your YouTube intro—can you just post that clip to Instagram? The simple answer is, it's risky.
Just because a track is cleared on YouTube doesn't mean it's okay for Instagram. They operate under completely different music licensing agreements. A song that plays fine on YouTube could easily get your Reel flagged and muted on Instagram, or even taken down completely.
Your best move is to either edit the clip to remove the copyrighted music or swap it out. A great trick is to upload your video without sound and then add a trending audio track directly from Instagram’s own music library.
Can I Post Someone Else's YouTube Video?
Technically, you can download and upload someone else's video. But the real question is, should you? And the answer to that is a hard no, unless you have clear, written permission from the person who made it.
Taking content that you didn't create is a straight-up violation of copyright law and a fast way to get in trouble with Instagram. It can lead to your post being deleted, your account getting a strike, or in the worst-case scenario, getting shut down for good.
Stick to creating clips from your own YouTube channel. If you're dying to share something amazing from another creator, the "Link" sticker in your Instagram Story is your best friend. It’s the right way to share—it gives them the credit and keeps your account safe.
Why Does My Video Look So Blurry on Instagram?
It’s incredibly frustrating. You upload a beautiful, crisp 4K video, and Instagram turns it into a pixelated mess. What’s going on? It usually boils down to one of a few things:
- Aggressive Compression: Instagram is ruthless when it comes to compressing videos. They do it to save server space and make sure content loads fast, but it often sacrifices quality.
- Wrong Export Settings: If your video isn't optimized for Instagram's specs before you upload, their compression algorithm will have a much harder time, making the quality drop even more noticeable. Always aim for 1080p.
- A Bad Connection: Trying to upload a big video file on shaky Wi-Fi is a recipe for disaster. The upload can get corrupted or compressed poorly. Always make sure you have a solid, stable internet connection.
To get the best results, you need to give Instagram a high-quality file that's already formatted for their platform. When you start with a clean, well-exported clip, the final product on your feed will look infinitely better.
Ready to stop spending hours on manual edits and start seeing real growth? With Repostly, you can put your content machine on autopilot, turning your best YouTube videos into a consistent flow of high-quality Instagram posts. Try Repostly free for seven days and feel the difference.
Keep reading
10 Fresh Instagram Story Idea Tactics for 2025
Stuck for content? Discover our top Instagram story idea list, with actionable tips to boost engagement and grow your audience in 2025.
A Practical Social Media Planner for German Markets
Build a results-driven social media planner for Germany. This guide offers actionable strategies for content, scheduling, and analysis in the German market.
Crafting Your Social Media Content Plan
Stop guessing and start strategizing. This guide provides an actionable social media content plan to audit, plan, and execute content that gets results.
Post once. Show up everywhere.
Start your 7-day free trial and publish your next video to every platform in minutes.Pick a plan and publish your next video to every platform in minutes.
Start your free trialSee plansCancel anytime