How to Schedule Social Media Posts: Native Tools vs. One Scheduler
Where TikTok, Instagram, Facebook, YouTube and Threads let you schedule posts, how far ahead each allows, and when one scheduler for all of them is worth it.
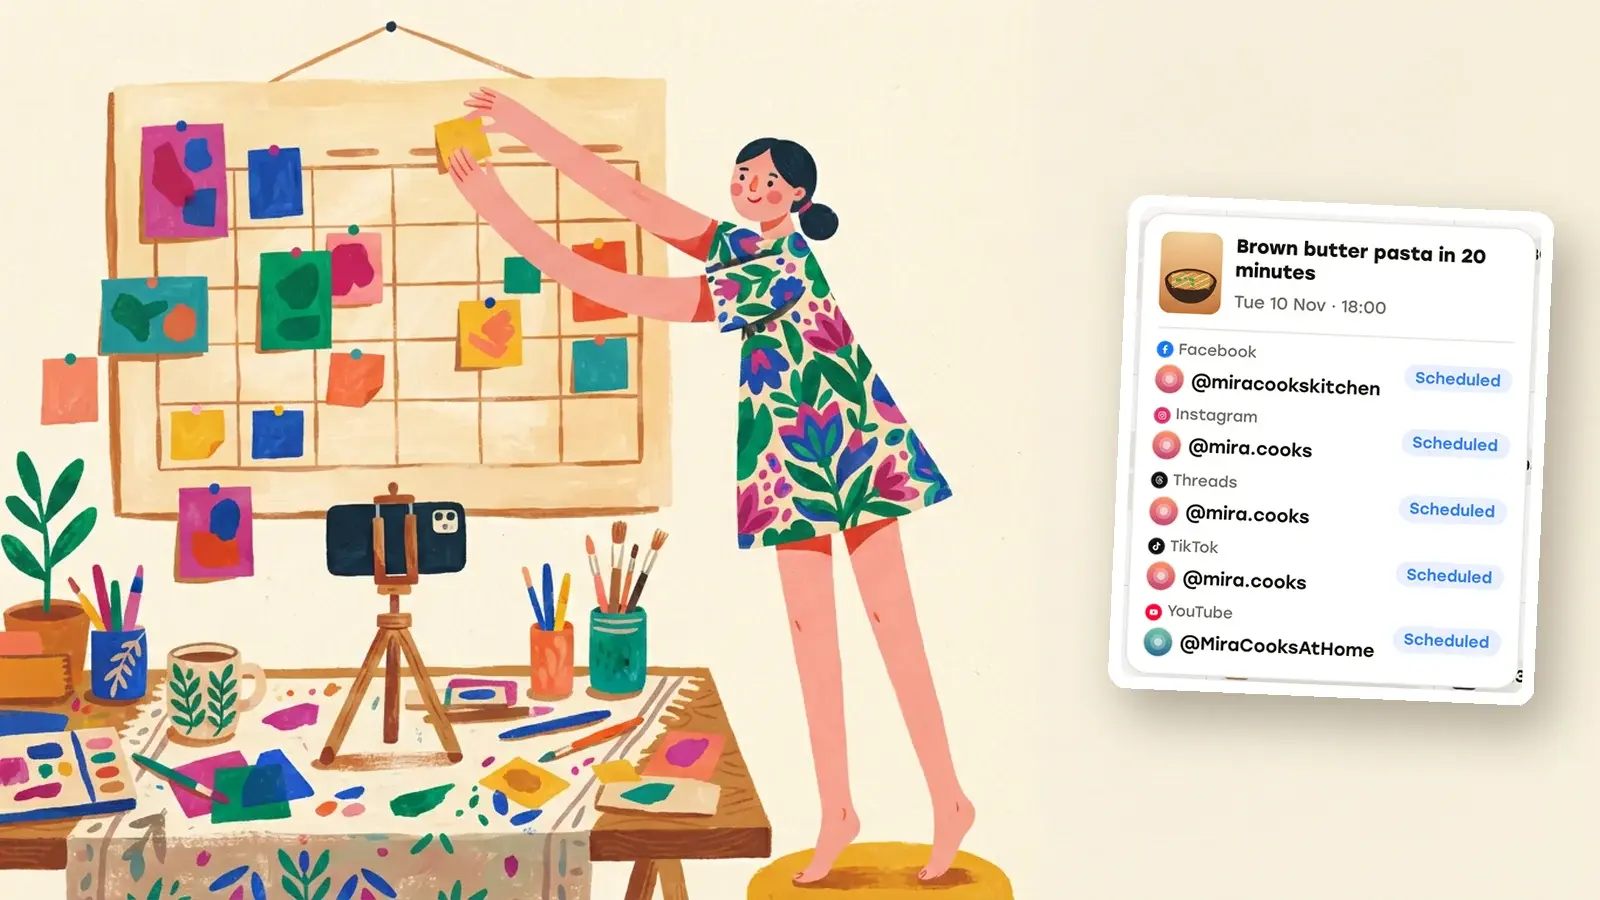
To schedule a social media post, you finish it as usual and pick a date and time instead of publishing right away. Every major platform now has a scheduler built in, but each one works differently: TikTok’s only runs on its desktop website, Instagram’s lives in the app, Facebook’s sits in Meta Business Suite, and the limits on how far ahead you can plan range from 10 days to no stated limit at all.
If you post to one or two platforms, those built-in tools are free and usually enough. If the same video goes to TikTok, Instagram, YouTube, Facebook and Threads every week, you’ll spend more time re-uploading than creating, and that’s where a single scheduler earns its keep.
The built-in schedulers and their limits
These come from each platform’s own help pages, checked November 2026. Platforms change these windows without much notice, so treat the numbers as a snapshot.
| Platform | Where you schedule | How far ahead | Worth knowing |
|---|---|---|---|
| TikTok | Upload page on tiktok.com in a desktop browser | 15 minutes to 10 days | Not on mobile web; a scheduled post can be deleted but not edited |
| Instagram app, under More options when you create a post or reel | Up to 30 days, max 25 posts a day | Public accounts only; reels, photos and carousels | |
| Facebook Page | Meta Business Suite, from your Page | 20 minutes to 29 days | Up to 365 days with some paid Meta One plans (mobile only) |
| YouTube | YouTube Studio or the YouTube app | No maximum stated | The video stays private until its publish time |
| Threads | Composer, three-dot menu, then Schedule | No maximum stated | Scheduled posts wait in your drafts folder |
A few details that the table can’t hold:
TikTok. According to the Schedule video help page, you upload on tiktok.com in a desktop browser, turn on the schedule toggle and pick a date and time, which defaults to your computer’s time zone. The page also lists account requirements; if you don’t see the schedule option on the desktop upload page, your account isn’t eligible yet. There’s more on this in how to schedule TikTok videos.
Instagram. You turn on Schedule this post or Schedule this reel under More options before sharing, and you manage everything later under Scheduled content in your profile menu (Instagram Help). Product tags, collaborative posts, sponsored posts and fundraisers can’t be scheduled. Scheduled posts keep the privacy and audience settings they had when you scheduled them.
Facebook. Pages schedule through Meta Business Suite, and the time follows your current time zone (Meta Business Help). From the Planner you can edit, reschedule or move a scheduled post back to drafts. Pages and profiles in professional mode can also schedule from the Facebook app’s post settings, and Meta One subscribers on the Advanced, Expert or Max plans can schedule up to 365 days ahead there, on mobile only (Meta Help, checked November 2026).
YouTube. In YouTube Studio you upload the video, open the Schedule card and set the date, time and time zone (YouTube Help). To change the time later the video has to still be private. One catch: if your channel has a Community Guidelines strike, a scheduled video won’t publish during the penalty and you’ll have to reschedule it.
Threads. Threads announced scheduling in January 2025. You tap the three-dot menu in the composer, pick a date and time, and the post sits in your drafts until it goes live, where you can still edit or delete it (Threads announcement, checked November 2026).
When a separate scheduler is worth it
The built-in tools have one big weakness: each only knows about itself. Five platforms means five uploads of the same file and five places to check whether something actually went out. TikTok’s ten-day window and no-edit rule make it the hardest one to plan around.
A separate scheduler starts to pay off once the same video goes to three or more platforms, because one upload replaces several. It also helps if you batch: film on Sunday, spread the posts over the next few weeks, and you’re past TikTok’s ten days by the second Wednesday. Repostly holds them for as long as you like, and each one goes out as long as the accounts stay connected and your plan is active when it’s due.
Timing is the other reason. Your best posting hours may be 7 a.m. or the middle of a meeting, and a scheduled post doesn’t care. For picking those hours, see the best time to post on social media.
And there’s the overview. One calendar shows gaps and clashes that five separate apps hide. If you’re setting one up, a social media content calendar covers the planning side.
Skip it when you post a few times a week to a single platform. The native scheduler is free and already in the app you use. Also skip it for anything that depends on the moment: live streams, replies to a trend that’s peaking today, or posts built around an in-app feature a scheduler can’t reach.
“Automate social media posts” is a popular search, so a word on that. Scheduling automates the publishing step and nothing else. Someone still has to write the caption, pick the time and answer comments afterward. Be wary of tools that promise growth on autopilot, and only schedule content you made or have the rights to.
Get the post ready before you pick a time
Scheduling goes smoothly when the content is finished first. A short checklist:
- Export one master file. Edit once and export at full quality, rather than saving a separate version per app. If YouTube is a destination, keep in mind that YouTube treats a square or vertical video of up to 3 minutes as a Short (YouTube Help, checked November 2026).
- Write one caption, then adjust per platform. A YouTube title, a shorter Threads version, different hashtags on TikTok. Decide this now rather than in five apps later.
- Settle the per-platform choices. Who can see it on TikTok, whether it’s made for kids on YouTube, whether a Facebook video goes out as a reel.
- Check the rights. Your own footage and music you’re allowed to use. Reposting someone else’s video isn’t something a scheduler should help with.
How to schedule one post to several platforms with Repostly
Repostly is built for the case above: one upload, several destinations, one time. Here’s the full flow.
1. Connect your accounts
Open Accounts and connect the profiles you post to, several per platform if you run them. Each one connects through the platform’s own sign-in, so Repostly never sees your password. On Facebook you connect Pages, and on Instagram you connect professional (business or creator) accounts.
2. Start a post and choose the type
Click New post. The post type menu has Video, Image, Image carousel and Text. Which destinations accept which type:
- Video: TikTok, Instagram (as a reel), YouTube, Facebook (as a reel or a regular video) and Threads.
- Image and Image carousel: Instagram, Facebook, TikTok and Threads. Not YouTube.
- Text: Threads only.
On Instagram, Repostly focuses on reels, images and carousels, so post Stories in the Instagram app.
3. Add the content and pick destinations
Upload your video or choose images, write the caption, then tick the accounts under Destinations. You can pick several accounts on the same platform.
4. Adjust each destination under Settings
The Settings card has one row per destination. Open a row to change what only that platform needs:
- TikTok: who can view the video (required), whether comments, Duet and Stitch are allowed, and the content disclosure if it promotes a brand.
- YouTube: a different title, privacy, description and the other YouTube fields.
- Instagram: a different caption and whether the reel also shows in your feed.
- Facebook: Post as Reels or Video, plus a different caption.
Repostly checks captions against each destination’s limit and lists anything that needs fixing above the button, so you find out before scheduling rather than at publish time.
5. Set the time and time zone
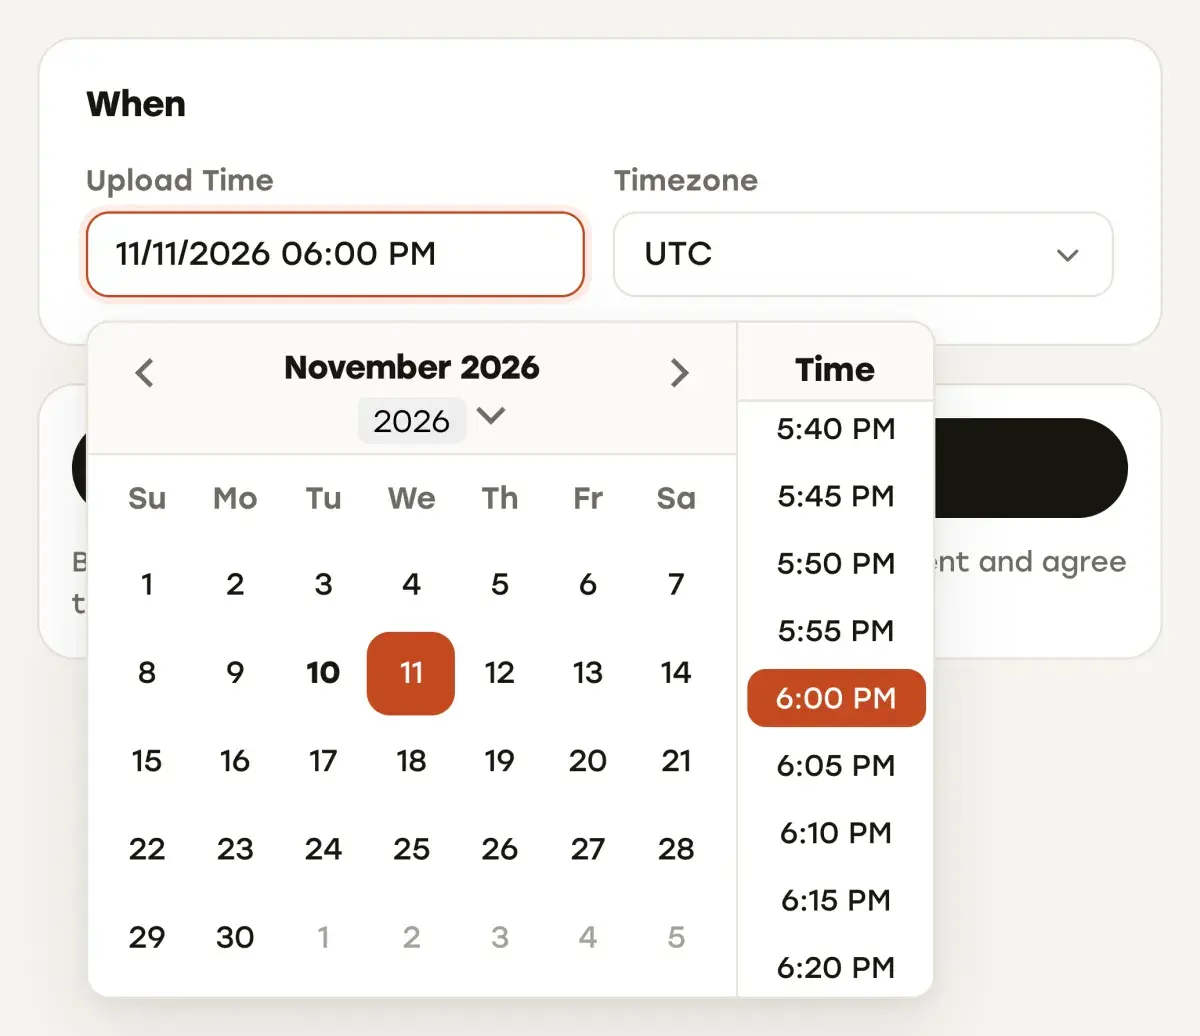
In the When card, pick the date and time under Upload Time. The Timezone field starts on your browser’s time zone; change it if you’re planning for an audience somewhere else. You can pick a date as far ahead as you like. The post goes out as long as the account is still connected and your plan is active when it’s due, so if you schedule weeks ahead, check those posts after changing plans or reconnecting an account.
6. Schedule it
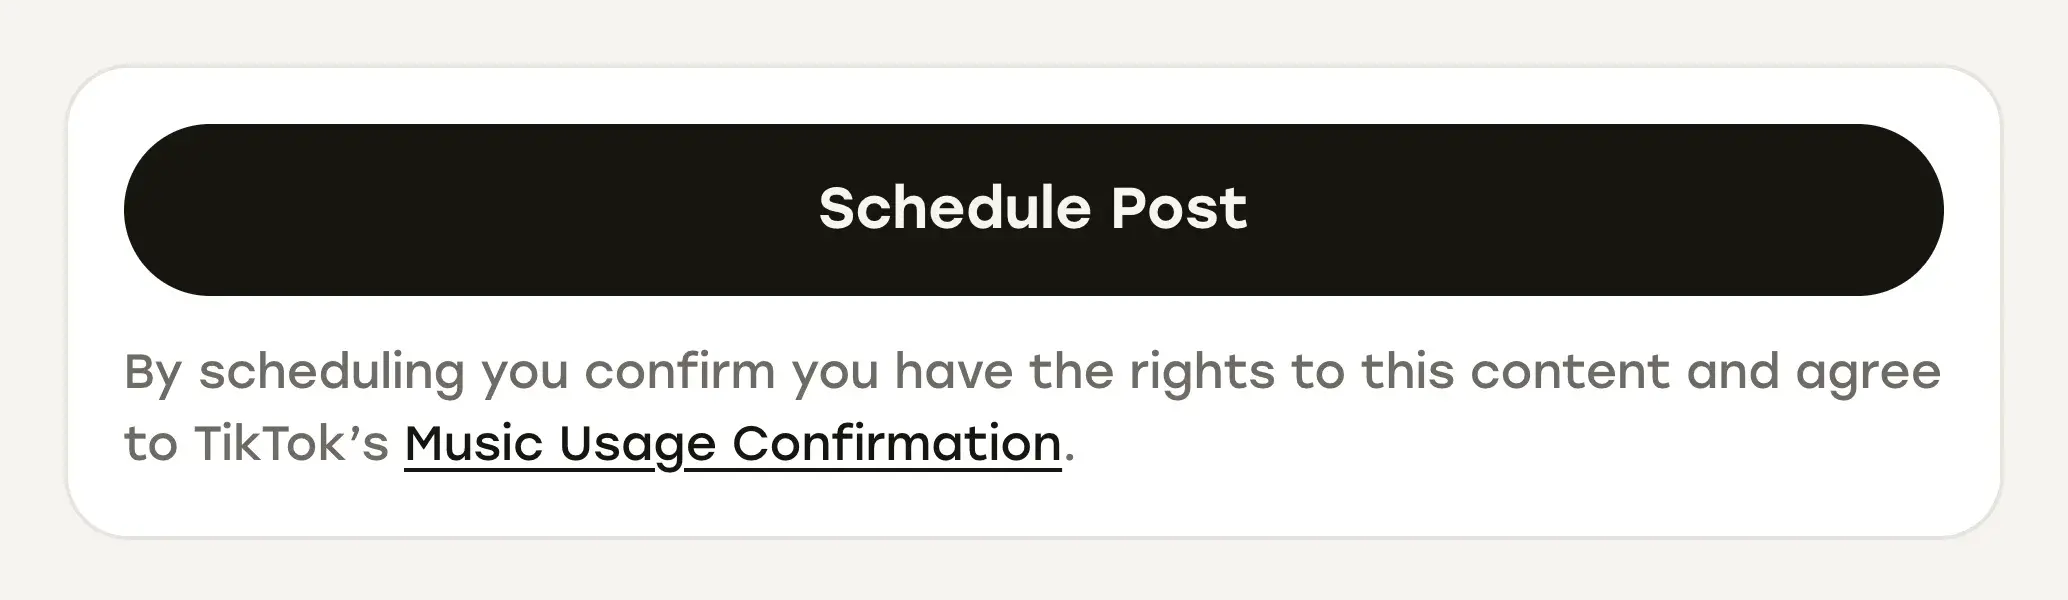
Click Schedule Post. If one of the destinations is TikTok, the line under the button tells you that scheduling confirms you have the rights to the content and agree to TikTok’s Music Usage Confirmation. It’s worth reading once, since you’re agreeing to it for every TikTok post you schedule.
After you schedule
Your post shows up in the Calendar, which has a month and a week view. Hover over a post to see every destination with its status, and click a scheduled post to open it in the editor if you want to change the caption, a setting or the time. That works as long as none of its destinations has gone out yet.
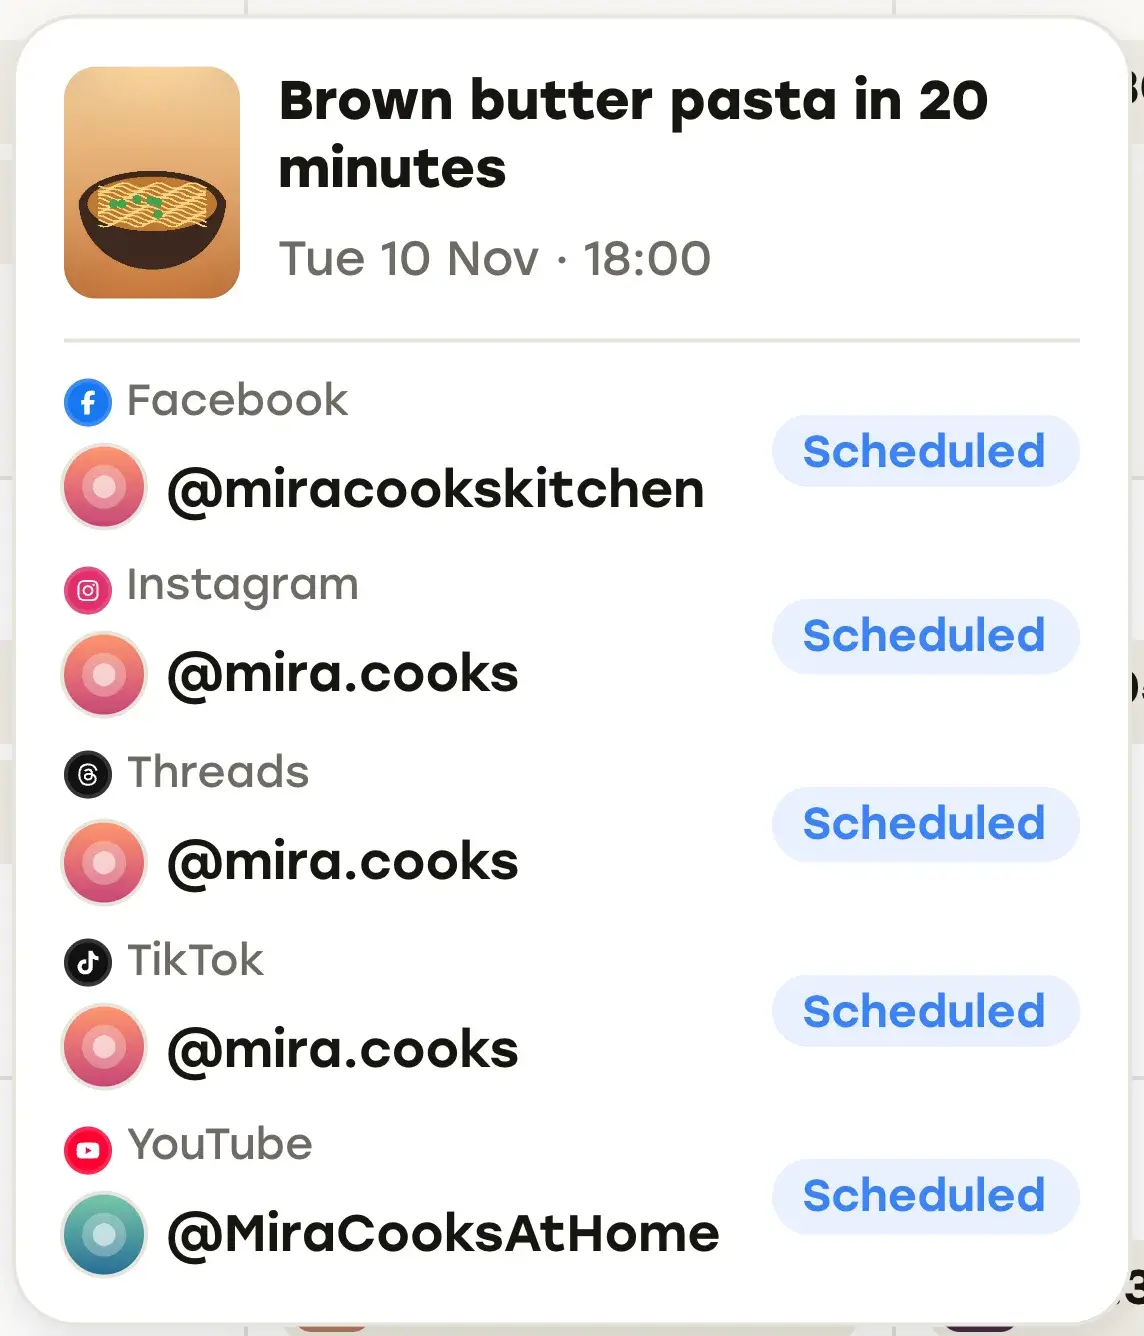
Publishing happens on our servers at the time you set, so your laptop can be closed and your phone can be off. After the post goes out, its detail page shows each destination separately, with its own status and its own views, likes and comments. If YouTube published and TikTok didn’t, you’ll see exactly which one needs attention.
There’s also a safety net: if publishing was paused when a post was due (for example, because your subscription had lapsed or an account was over your plan’s account limit) and it’s more than five hours late by the time publishing resumes, Repostly doesn’t fire it off on its own. It goes to a page called Posts that missed their time, where you choose to post it now, reschedule it or discard it. A paused post that’s still waiting 30 days after its time is marked failed instead. A post meant for Monday morning that lands on Monday night can do more harm than good.
Is Repostly right for you?
Repostly fits when the same videos go to several of TikTok, Instagram, YouTube, Facebook Pages and Threads, or to several accounts on one of them. Here’s what that gets you:
- One upload, every platform you pick. Each platform keeps its own settings in the same screen: a YouTube title, Reels or Video on Facebook, TikTok’s audience and disclosure options, separate captions.
- One calendar and one Insights view for everything scheduled and posted, across all your accounts.
- Per-destination results on each post’s detail page, so you know where it worked.
- A REST API and an MCP server if you’d rather schedule from scripts or an AI assistant.
Starter is $19 a month for 5 accounts, Pro is $39 for 15 and Expert is $79 for unlimited accounts. Yearly billing gives you two months free, and you can ask for a refund within 14 days of your first payment.
If you post the same video to more than one of these platforms, try Repostly free for 7 days and schedule next week’s posts from one screen.
Frequently asked questions
How do I schedule social media posts?
Finish the post, then pick a date and time instead of publishing right away. Each platform has its own scheduler: TikTok on its desktop website, Instagram in the app under More options, Facebook Pages in Meta Business Suite, YouTube in YouTube Studio, and Threads in the composer's three-dot menu. If you post the same content to several platforms, a scheduler like Repostly lets you upload it once and schedule every destination in one go.
Can you automate social media posts?
You can automate the publishing part: a scheduled post goes out at the time you set without you opening the app. Writing the post, choosing the time and answering comments afterward still need a person. Be careful with tools that promise to post for you on autopilot, and only publish content you have the rights to.
Keep reading

How to Schedule TikTok Videos: TikTok's Scheduler vs. Repostly
Yes, you can schedule TikTok videos. How TikTok's desktop scheduler works, its 10-day window, and what Repostly asks before it posts a TikTok for you.
The Best Time to Post on Social Media Is in Your Own Analytics
Why universal best-time charts don't fit your account, where Instagram, TikTok, YouTube, Facebook and Threads show your audience's hours, and how to test them.

How to Post Your Facebook Videos to YouTube, Step by Step
Facebook has no button that sends a video to YouTube. Get your own file back out of Facebook, then upload it to YouTube as a Short or a regular video.
Post once. Show up everywhere.
Start your 7-day free trial and publish your next video to every platform in minutes.Pick a plan and publish your next video to every platform in minutes.
Start your free trialSee plansCancel anytime